FreeNas is an elegant free Network Attached Server software that can be installed on an older PC to provide extra storage for media, tunes, files, you-name-it. I’ve been using it for storing student data from our student labs for almost a year. It has worked flawlessly. I”m in the process of setting up another server for another lab, and realized I hadn’t documented my current process for adding users, which I hope I’ll be able to automate further.
This is part 2 of 2. We’ve already eon the following:
1. Figured out the account names and passwords
2. Created the home folders for each account. The folder name matches the account name.
Now we’re going to create the actual student accounts within the web interface.
1. Create a group called students

2. Add the first user.

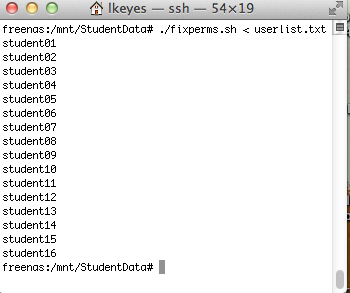
3. Once all the users are added, there is a final thing to complete. You need to go back into the terminal session and run the fixperms.sh script. What this script does is give ownership of the user’s folder to the user, and deny permission of other users to the folder.
If you get error messages when running the batch files, be sure that you have been painfully consistent regarding upper and lower case in the user names and the folder names. For these to work they must match, and FreeNas is case sensitive, unlike Windows / DOS. To save pain make everything lower case. (Note the screen shots have a mixed case… which I subsequently changed to all lower case).
