Tag Archives: freeNAS

FreeNAS: Automate Drive Mappings for Windows Users

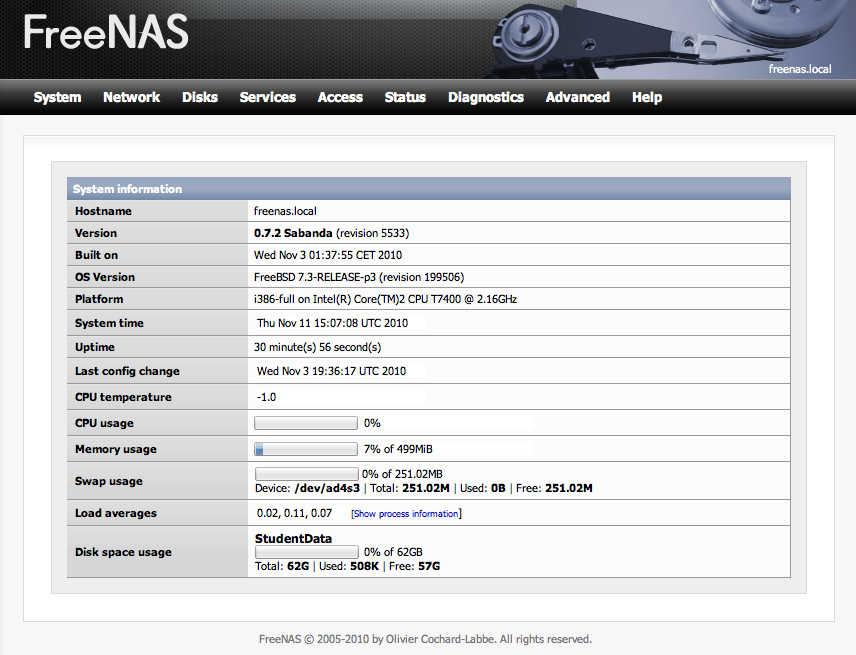
This is the third in a series about FreeNAS, the free network attached storage application which allows you to create an inexpensive but highly capable network file server for backups, iTunes, and general file sharing. Our application is a server for student data. We want to give each student a secure folder in which to store files that they create and use when working in our student computer labs.  The two previous postings are:

Creating a FreeNAS server for student data

Adding students and creating folders 

Note that the first link picks up at the point that the FreeNAS server software has been installed on to server hardware with a minimal configuration. The FreeNAS web site has links to several tutorials as well as the official setup guide.

By the way, FreeNAS installs really nicely within a virtual machine so you can easily test it out. I’ve got it running in Parallels on my MacBook, with software RAID 5 providing redundant disk storage.

Mapping a drive to a student folder

Once I set up the student’s folder and account on the FreeNAS server, I wanted to be able to give them the opportunity to access it from any workstation in our student lab.  The cleanest way I could think of was to create an icon on the desktop which runs a script. The script does the following:
1. Asks for the student login name
2. Asks for the student’s password
3. Maps the H: drive to the student’s folder on the FreeNAS server.

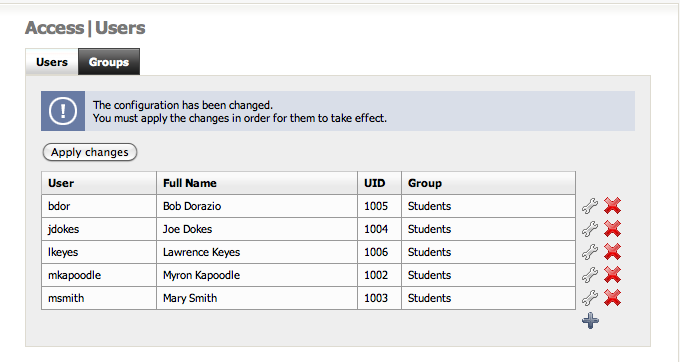
Student folders are named exactly the same as the student login, and they all appear under a shared folder called “StudentData”.  The full path is /mnt/StudentData/.  So, when student Myron Kapoodle logs in with his user name mkapoodle, the script takes him to: 

/mnt/StudentData/mkapoodle

Thus, when the student accesses drive H:, they find themselves in their own folder. They can’t select a folder “above” their own, and they can’t access anyone else’s folder, even if they can see it when browsing around the network neighborhood.

The Script

' VBScript to map a network drive.
' Heavily borrowed from ....
' Guy Thomas http://computerperformance.co.uk/
' Larry Keyes www.techfornonprofits.com
' ------------------------------------------------------'
Option Explicit
Dim strDriveLetter, strRemotePath, strUser, strPassword
Dim objNetwork, objShell, objFSO
Dim CheckDrive, AlreadyConnected, intDrive
strUser=""
strPassword=""

' This section gets the name and password
strUser=InputBox("Enter your User Name")
strPassword=InputBox("Enter your Password")

' The section sets the variables.
strDriveLetter = "H:"
strRemotePath = "\\freenas\StudentData\" & strUser

' This sections creates two objects:
' objShell and objNetwork and counts the drives
Set objShell = WScript.CreateObject("WScript.Shell")
Set objNetwork = WScript.CreateObject("WScript.Network")
Set objFSO = WScript.CreateObject("Scripting.FileSystemObject")
Set CheckDrive = objNetwork.EnumNetworkDrives()

If objFSO.DriveExists(strDriveLetter) Then
objShell.Popup "The H: Drive is already mapped"
objNetwork.RemoveNetworkDrive strDriveLetter
strRemotePath = "\\freenas\StudentData\" & strUser
objNetwork.MapNetworkDrive strDriveLetter, strRemotePath , false, strUser, strPassword
Else
strRemotePath = "\\freenas\StudentData\" & strUser
objNetwork.MapNetworkDrive strDriveLetter, strRemotePath , false, strUser, strPassword
End if

'Section which actually (re)names the Mapped Drive to eliminate naming problem.
Set objShell = CreateObject("Shell.Application")
objShell.NameSpace(strDriveLetter & "\").Self.Name = strUser
Wscript.Echo "Check : "& strDriveLetter & " for " & strUser
WScript.Quit

There is some extra stuff in there that attempts to fix an issue that appeared in Windows 7, where if the drive mapping is reused, it shows up with the name of the previous user.

Our student workstations have a single “student” local account.  Every student logs in to that account when they use the workstation. There are no individual user profiles. In some cases I have the student account log in automatically, and I’ll probably do this on all machines that use the FreeNAS network so that a student doesn’t have to log in twice…once to the desktop and once with their own user name and password on the FreeNAS server.

This script should be installed on each Windows workstation, with a desktop icon to appear on the desktop of the student account.

Two other observations and questions:

1. Obviously you can simply map a drive from the command line using Start->Run->CMD, and then at the prompt  type MAP H: /freeNAS/StudentData/mkapoodle.

2. I searched all over for a more elegant way to have a screen that came up that would ask for the name and password and then make the call to create the drive mapping. First I looked at C#, then, because Visual Basic has a “shell” command, I switched to VB. However that required a full-blown Windows installation of the .exe file, as well as a batch file which was called by the VB program. I finally decided I could live with two windows popping up; one asking for the name and another for the password.

freeNAS File Server for Student Data – Adding Students

Last time I talked about freeNAS, the free Network Attached Storage application that allows you to easily create a file server.  There are several sites online which have documentation on how to get a freeNAS server up and running. What I hadn’t found was much information about how to create a secure multi-user environment to allow students to save their data.  Here are the specs:

1. Students will access the server from a Windows XP or Windows 7 workstation
2. Students will use a mapped drive to access the freeNAS server
3. Students will have their own dedicated folder.
4. Students will be restricted to their own folder, and any subfolders that they create.
5. Students are issued a user name and password for the freeNAS password

Initial steps to prepare the server: using the freeNAS web page
1. Create a mount point on the server.  I called mine “StudentData”
2. From the Services Menu, Select CIFS
3. Create a folder share using the StudentData as the name, and the StudentData mount point.
4. From the Access menu create an access group called “Students”.

Using the freeNAS console –
3. Select 6 from menu to get to a shell prompt
4. Change to the “root” of the mounted volume.
cd /mnt/StudentData
5. Allow everyone to traverse the directory, but not to change or execute, only the root (supervisor) can delete or add.
chmod 711 /mnt/StudentData
chown root /mnt/StudentData

Organize the student user names and passwords
1. Get the full name of each student.
2. Assign passwords to each student.
3. Assign the login name for each student.  I use the first initial and last name
4. Add the student within the Gui under Access : Users and Groups
5. Add the student’s login name, and password
6. Assign the student’s home folder as /mnt/StudentData/ Note that the folder does not have to physically exist yet, although if you want to be able to choose the correct folder from the drop down box, it needs to be created on the disk beforehand. 
7. Save changes
8. Be sure to save the changes clicking on the button “Apply Changes”.

At the freeNAS console:
4. Create a folder on the server with the same name as the login name.
Example: I have a student named Myron Kapoodle, this person will get a folder called mkapoodle.

mdir /mnt/StudentData/mkapoodle

5. Give the student ownership of their folder, and allow the owner to read/write/execute within their folder.

chmod 700 /mnt/StudentData/mkapoodle
chown mkapoodle /mnt/StudentData/mkapoodle

6. At this point, the folder should be accessible from the network.  For example, from a Windows machine you can map a drive …

MAP H: \\freeNAS\StudentServer\mkapoodle
You’ll have to enter the name and password.
This may not be entirely foolproof in a lab situation with numerous students accessing the same workstation, so I’ve developed at least a partial solution which I’ll outline in a future post.

freeNAS File Server for Student Data

FreeNAS is an open source file server program based on BSD Unix. It is available as an .ISO file for downloading and burning to a CD. It will work in 256Kb of memory. While freeNAS is ideal as a “home” server using an older PC, it scales to modern server hardware. Out of the box it provides software RAID (provision for redundant disks) and it can work as a server for Windows, Apple Macintoshes, or Linux workstations. There are several installation guides available, and you can have a basic Windows server up and running within thirty minutes. Here’s a look at the opening screen in the web management program. (Click the image to enlarge).

I’ve  installed it twice; once within a Parallels virtual machine on my MacBook Pro, and once on an older Dell Optiplex G270.

We are considering using freeNAS as a server for student work within one of our learning centers. Currently, students are save their files on USB thumb drives, but that seems to be a poor solution; the drives get lost, or infected with viruses. We don’t want the students on the “administration” network, so we are looking for alternatives. FreeNAS seems to be a good alternative to another Windows server. Our plan is to give students accounts on a FreeNAS server, which will give them a single folder that they can access from Windows XP and Windows 7 desktop machines, or Windows 7 laptops over a wireless network.

Most installation guides assume you are creating a home server for Windows workstations, and they bring you to the point to where any workstation can find the server, connect to it and store files. Our application requires that individual students have their own folder on the server, and that they cannot access anything else outside of that folder.  Further, we want the student to be able to log into the server independently of the local Windows workstation account. We don’t want to create separate profiles on each workstation for each student, because their is no guarantee that the student logs into the server from the same workstation each time.  The plan is to have the student map a drive letter to their freeNAS folder using a connection script that automates the NET USE command.

In addition to the link above, there is another more detailed installation guide at daily-cup-of-tech.